
How do I create a group account on my ReadyNAS OS 6 storage system?
You can use Local Users mode to manually create, manage, and delete group accounts on your ReadyNAS storage system.
This section assumes that your ReadyNAS system is currently in Local Users mode. For more information about user and group management modes, see the "What user and group management modes are supported by my ReadyNAS OS 6 storage system?"support article.
To create a group:
Use the local admin page to create groups.
1. Select Accounts > Groups.
2. Click the New Group button.
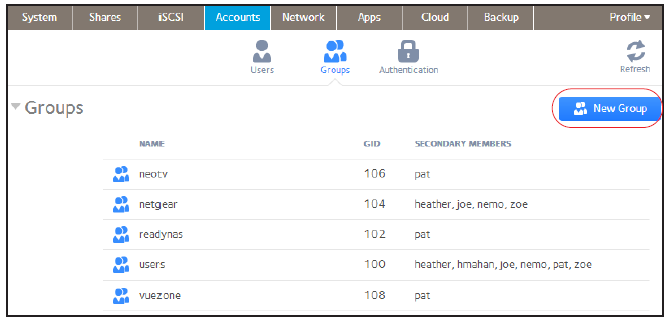
The New Group pop-up screen displays.
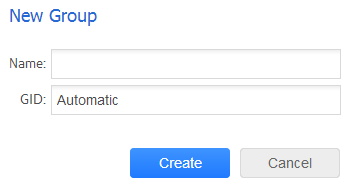
3. Enter the following information for the new group:
-
Name. Group names can have a maximum of 31 characters in most non-Asian languages. If you use Asian language characters, the limit is lower. You can use most alphanumeric and punctuation characters for a user name.
-
GID. The GID is a unique group ID number assigned to each group. By default, the ID number is automatically set, but you can manually enter a number if you prefer.
4. Click the Create button.
The group is added to your system.
This article applies to the following ReadyNAS and EDA storage system models:
-
ReadyNAS 102
-
ReadyNAS 104
-
ReadyNAS 312
-
ReadyNAS 314
-
ReadyNAS 316
-
ReadyNAS 516
-
ReadyNAS 2120
-
ReadyNAS 3220
-
ReadyNAS 4220
-
EDA 500
Published 04/23/2013 08:56 AM | Updated 11/29/2013 02:43 AM